Wednesday, 5 November 2025

No Knead Bread using Air Fryer

 06 Nov 2025

Baking Bread in the Air Fryer 🍞✨

Good morning!
I’m excited to share my little “experiment” of baking no-knead bread in the Air Fryer.

I finally tried baking no-knead bread in the Air Fryer after seeing so many posts about it. Yesterday, I gathered the flour I had at home and gave it a go. The result? A crisp crust, soft inside, and a surprisingly good outcome, though I’ll adjust the flavor a little next time. 

More than the bread itself, I loved the process. It was simple, fun, and incredibly therapeutic. 😊😊😊 If you’re curious, give it a try. I think you’ll enjoy it too! 


This is what I did:
Ingredients :
1.5 cups lukewarm water
1.5 tsp instant yeast
1 tsp sea salt  (will increase to 1.5tsp next round)
1 Tbsp sugar
2.5 cups whole meal flour
0.5 cup bread flour

I used whole meal flour because it was the only one left in my kitchen. It was an impulsive, ad hoc decision to just go ahead—hahaha! I didn’t check my stock, but I’m happy with the result.


The bread baked by Air Fryer! Hallelujah! Praise God for giving me interest to try out different method of cooking.

Method:
Step1: Combine all ingredients together. I used chop stick to work and combine them in a big plastic container. Cover, let it prove for about an hour or double in size.


Step 2: After it proved to double. I dip my hand into water (very wet hand to prevent dough stick on hand) and slowly with my fingers pulling from the edge of the dough (photo 1) and bring it into center of the box. Until all come to a ball shape (see photo 2). Process it about 2-3min.

 (photo1)


(photo 2)

Step 3: Repeat Step 2 process for 2 to 3 times. Total time to prove the dough taken yesterday was 3 hours. The dough will become softer compare to the 1st round.


This is the proving after 2 hours:


I use a cover as in the photo: 


Step 4 After 3hours of provingPrepare a piece of Air Fryer Parchment paper, oiled it. Placed it into Air Fryer. I did step 2 pulling the dough  after 3hours & shaped into a ball, then, transfer and place dough onto the parchment paper inside the Air Fryer container as shown in the photo. And let it prove to double size. Approximately 30mins:

This is after 30mins proving in Air Fryer (electricity off). After the dough sits in Air Fryer for proving. (total fermentation process - 3.5 hours). Sprinkle some flour before slitting it:


After slit: 


Step 5: Bake in Air Fryer for 20min in 180 degree Celsius, then, 190 degree Celsius for 5min. Next time I will pre-heat Air Fryer to experiment whether will there be a different. But this first try using Air Fryer is done without pre-heat. The result is good.

Give it a try! I’d love to know which country you’re viewing this post from. If you found it helpful, please leave me a note—it really encourages me to share more in the future.

Monday, 21 April 2025

Whole Meal Wheat Bread (Added Yudane dough)


Yudane:

Ingredients
80g boiling water
70g whole meal flour


Method
1. Combine the 70g hot water into 70g whole wheat flour. As the dough was too dry, I added another 10g hot water.
2. Let the mixture stay at kitchen counter for an hour or cool then store into fridge.
Note: I make the bread the same day

Ingredients
150g yudane see above method.  made a night before (70g whole wheat + 80g water)
200ml warm water (split 100ml water add with instant yeast, 100ml stir well into poolish)
2 Tbsp oil
1 tsp salt
1 tsp instant yeast (3g) ( added into warm water with ½ teaspoon sugar before put into BM)
90g Spelt/dye flour + wheat bran (20g Wheat bran, 40g dye flour, 30g spelt flour)
160g White Bread flour
30g whole wheat flour
40g seeds (1 Tbsp flaxseed, 1½ Tbsp 7 mixed seeds)

Total flour added with seeds 390g (330g + 70g made into Yudane as above)
Total water 280ml (200ml + 80ml made into Yudane as above)

2 Tbsp milk powder
½ Tsp brown sugar (added into water as above)

Main dough (sequence in Bread Machine):
1. Stir 100ml slightly warm water into 150g yundae and mix it well.
2. Stir 1tsp instant yeast into 100ml warm water added with ½ tsp brown sugar.
3. In the BM, measure dry ingredients: 20g wheat bran, 40g dye flour, 30g spelt flour, 160g bread flour, 30g whole wheat flour, 10g flaxseed, 30g 7 mixed seeds (total 320g seeds & four)
4. Dig a hole into the flour and add 1 tsp salt.
5. Add 2 Tbsp milk powder (Oops! I forgotten to add milk powder)
6. Pour in Main dough pt1 and pt2.
7. Add 2 Tbsp olive oil.

BM set medium shade. Whole meal wheat Bread. My BM is No. 3 for Wholemeal Bread. 3 hr 25min

The loaf is shorter than the usual one. It could be I had forgotten the milk powder. OOPS!

Saturday, 19 April 2025

Bittersweet Mini Brownie

18Apr2025
Today is a public holiday—Good Friday. A day to pause, reflect, and for me, to bake for loved ones and make someone smile. It’s been almost two years since I last baked, but today feels like the perfect time to dust off the baking tins and bring joy to my family in the form of bittersweet chocolate.

Our family has a love for all chocolate and cocoa things. Dark chocolate, chocolate desserts, and especially bittersweet brownies are our collective weakness. There was a bakery nearby that made the most incredible bittersweet brownies, the kind that felt like a warm hug with every bite. But sadly, the bakery moved away, leaving us yearning for that perfect bittersweet blend.

So today, with the aroma of cocoa swirling around the kitchen, I’m taking matters into my own hands—not just for nostalgia’s sake, but to make my husband smile. He loves brownies, and there's something magical about how the simple act of sharing chocolatey treats can spark joy in him. It's a small, sweet reminder of how food brings us together.

But as I measure the cocoa and melt the butter, I find myself reflecting on the deeper meaning of this day. Have you ever wondered why Good Friday is called "good"? It’s a question I used to ask myself too. How could a day marked by suffering hold such profound hope?

One day, I came to understand. Good Friday is "good" because it’s about unconditional love of God —the kind of love that changes everything. On this day 2000 years ago, Jesus, the Son of God, gave His life on the cross for all of us. It wasn’t just an act of sacrifice; it was a declaration of love. A love that says, "You matter." A love that opens the door to eternal life for everyone who believes. Imagine you stand at the bottom of that cross, at that place where Jesus was crucified and hung there suffering and saying this to you "You matter. I've you in my mind because you matter. Because I love you and I want you to be with me in my Father's house..."

"For God loved the world in this way: He gave His one and only Son, so that everyone who believes in Him will not perish but have eternal life." (John 3:16, CSBV).

So, as I bake today, I hold onto this bittersweet truth. Just like the perfect brownie—bitter and sweet at once—Good Friday reminds us of both the sorrow of sacrifice and the sweetness of God's grace. And that’s why it’s good. It reminds me that I no longer walk this journey alone; my Jesus, who loves me deeply, is with me always.

This time, I decided to experiment a little with the recipe. Last week’s brownies turned out a touch too sweet, lacking the rich bitterness we love. So, I adjusted. Perhaps that’s fitting, too—life is about trial and error, learning, and adapting along the way. And just as baking requires a balance of flavors, life holds its own blend of bitter moments and sweet blessings. 

In this world, troubles are inevitable, and life is rarely smooth sailing. Yet, I find comfort in knowing that Jesus is always there to hold my hand, especially when the journey feels tough. You see, when we hold someone’s hand for too long, we can grow tired. But God never tires. When He holds your hand, He holds it firmly and never lets go. His grip is steadfast, unshaken. Let Him hold your hand and walk with you through life’s trials and triumphs—His love is your anchor on this earthly journey. He will hold me fast! He will hold you fast too if you let Him...

I love this song by Keith & Kristyn Getty "He will hold me fast":

When I fear my faith will fail
Christ will hold me fast
When the tempter would prevail
He will hold me fast
I could never keep my hold
Through life's fearful path
For my love is often cold
He must hold me fast
He will hold me fast
For my Saviour loves me so
He will hold me fast


Ingredients

A-Ingredients
50g all-purpose flour
60g unsweetened cocoa powder
10g ground almond
1 teaspoon instant coffee powder
1/2 teaspoon baking powder
pinch of salt

B-Ingredients
2 eggs
50g sugar
100g melted butter (salted)
1 teaspoon vanilla essence

Optional Ingredients
4 or 5 whole walnuts, then chop
2 tablespoon chocolate chips

Method:
1. Preheat oven 180 degrees
2. Prepare a baking tin. I used a 10cmx20cmx5cm baking tin lay with parchment paper.
3. B-Ingredients -Beat eggs with sugar till combined. Add in melted butter & vanilla and mix them well.
4. Sift A-Ingredients and add into pt3. Combine them well but not over stir.
5. Stir in Option-ingredients and then pour mixture in the baking tin.
6. Bake in oven for 20 to 25 min, when skewer check come out dry & clean. (As it is a small & quite a mini bake, to conserve energy, I used my toaster oven instead. Baked for 20min)
7. After it's done, remove from oven and let it cool on kitchen. Cut & serve with ice-cream(optional)

Notes: I like bittersweet brownies; this version is very less sweet than usual. Also, I have used low GI sugar to manage glucose. I had reduced lots of sugar. You may increase the sugar to 60 or 70g. Adjust according to your taste. 

The baking methods and ingredients above are tailored to suit my personal taste. While I am not a professional baker, I have a deep passion for baking. This creation is made with love for my family, and I’m excited to share my baking journey and recipes with you. I hope they inspire you to bake something special and bring a smile to someone’s face as well.😊

If you enjoyed this recipe, I’d love to hear your feedback! Your kind comments and encouragement will inspire me to continue baking and sharing more of my culinary adventures.

Disclaimer: The recipes and baking methods shared here are based on my personal preferences and experiences as a home baker. I am not a professional, and the results may vary depending on individual techniques, equipment, and ingredients. Please use this recipe as a guide and adapt it as needed. Feedback is always welcome, but please keep in mind that this is a journey of passion and creativity rather than expertise.


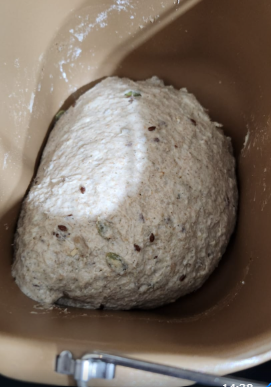
This is photo taken just before it enters the oven.


Wednesday, 2 April 2025

Whole Meal Wheat Bread with poolish starter (Bread Machine)

Whole Meal Wheat Bread added with dye flour and spelt flour and some seeds added with poolish starter.
I recently read that bread made with a poolish starter tends to be soft and fluffy, so today, I'm giving it a try using my underutilized bread maker. After successfully baking two rounds of whole meal wheat bread with this relatively new machine, I feel confident that adding a poolish starter will enhance the quality even further.

I made bread with a poolish starter many years ago, and it turned out well. However, I stopped baking for quite some time and nearly forgot the techniques I used back then. Now, I am rediscovering the joy of bread making with my bread maker. Previously, I only baked non-whole meal bread, but today, I'm trying my hand at making a healthier option: low-sugar, high-fiber whole meal bread enriched with seven types of seeds.  High-fiber bread is said to help with glucose management, which inspired me to experiment with this new recipe.

I am grateful for the success of the last two loaves I've baked and look forward to seeing how this bread turns out!

Disclaimer: The healthier bread option described here, including its high-fiber content, is intended as a general dietary choice and is not a substitute for professional medical advice. While high-fiber bread may contribute to better glucose management for some individuals, results can vary. Please consult with a healthcare professional or a dietitian for personalized dietary recommendations and guidance on managing glucose levels.

This is the loaf made without poolish, but the ingredients are exactly the same. Wrote this blog while waiting for my bread to be ready. 


Poolish starter


Poolish starter:
Ingredients

100g water
100g whole meal flour
pinch yeast & sugar

Method
1. Combine 100g whole wheat flour add 100g water & a pinch of yeast &  sugar into a container. This mixture is 200g poolish.
2. Let the mixture stay at kitchen counter for an hour then store into fridge.
Note: I made at 11pm and use it the next day at 1:30pm. About 14hours. According to google, poolish can be kept in fridge for 2 days.

Ingredients
200g poolish starter see above method.  made a night before (100g whole wheat + 100g water+ pinch yeast)
180ml warm water (split 100ml water add with instant yeast, 80ml stir well into poolish)
2 Tbsp oil
1 tsp salt
1 tsp instant yeast (3g) ( added into warm water with ½ teaspoon sugar before put into BM)
90g Spelt/dye flour + wheat bran (20g Wheat bran, 40g dye flour, 30g spelt flour)
160g White Bread flour
40g seeds (1 Tbsp flaxseed, 1 ½  Tbsp 7 mixed seeds)

Total flour added with seeds 390g (290g + 100g made into poolish as above)
Total water 280ml (180ml + 100ml made into poolish as above)

2 Tbsp milk powder
½ Tsp brown sugar (added into water as above)

Main dough (sequence in Bread Machine):
1. Stir 80ml slightly warm water into 200g poolish and mix it well.
2. Stir 1tsp instant yeast into 100ml warm water added with ½ tsp brown sugar.
3. In the BM, measure dry ingredients: 20g wheat bran, 40g dye flour, 30g spelt flour, 160g bread flour, 10g flaxseed, 30g 7 mixed seeds (total 290g seeds & four)
4. Dig a hole into the flour and add 1 tsp salt.
5. Add 2 Tbsp milk powder
6. Pour in Main dough pt1 and pt2.
7. Add 2 Tbsp olive oil.

BM set medium shade. Whole meal wheat Bread. My BM is No. 3 for Wholemeal Bread. 3 hr 25min


Bread dough in BM with Poolish starter added.


Whole meal wheat bread BM cycle completed. (this is not the bread added with poolish). Will update when bread is ready. Created this blog while my bread is still in progress. I have the confidence that the bread with poolish starter will turn out well. 


Whole meal wheat bread with added seven seeds, dye flour, spelt flour, white bread flour and whole meal wheat flour. The ingredients are exactly the same as in above ingredients list. Just that I took out 100g whole meal flour and 100g water to mix into poolish starter a night before.


Bread dough with poolish starter fermenting ....


Bread Maker cycle completed. Bread with poolish starter.


Finally at 17:30hr the final product is out!! Bread with poolish starter. The aroma of this bread is wonderful. It's much more fragrance than the one without poolish. I'm not too sure how the inside would look like. I'm looking forward to cutting the loaf and taste the bread. πŸ˜„πŸ˜„

Wednesday, 5 June 2019

Seafood Aglio Olio


06 June 2019 - "δΈ€δΈͺ人吃ι₯­"

Today's special. Cooked this simple aglio olio specially for a VIP 😊 I have used my existing mushroom aglio olio recipe and add on seafood.

I have replaced swiss mushroom with shitake mushroom and added some fresh herbs from my garden

Detail method of cooking spaghetti is found in my recipe for Bolognese Spaghetti.


Ingredients:
3 large prawns
3 fresh scallops
1 shitake mushroom -sliced
4 cloves of garlic - chopped
1-2 tablespoons olive oil
4-5 leaves sweet basil
1 stalk spring onion - chopped
1 chilli padi - remove seeds, chopped(optional)

100g -125g  spaghetti
Water for cooking spaghetti
1 tablespoon of oil
2 tsp salt

Method:
1. Cook the spaghetti in boiling salted  water(added oil) according to packet instructions and drain  thoroughly. Set aside. Note : keep 1/2 cup of water after boiling the spaghetti.

2. Clean and deshell prawns. Washed scallop. Seasoned prawns and scallop with a pinch of salt and some pepper. Set aside.

3.In a clean wok/frying pan , pan sear both prawns and scallops until they are cooked and lightly brown. Remove from heat and set aside.

4.Fry garlic in olive oil until fragrance and golden brown.  Remove fried garlic into a bowl, leave  the oil in the wok. Add mushrooms in the wok to fry for 30sec then add cooked spaghetti. If it is too dry, add a little water from boiling the pasta. Add a pinch of salt or 1 tsp of fish sauce to adjust to your taste. Add chopped onion and chopped basil. Add the fried garlic. Add chopped chilli if you like spicy pasta. Stir well. Remove from heat. 
Serve with pan seared prawns and scallop.


Wednesday, 18 November 2015

No Knead Sandwich Buns


Ingredients:
1 1/2 cups lukewarm water
1 1/2 tsp instant yeast
1 tsp sea salt
1 tbsp fine sugar
2 1/2 cups bread flour
1/2 cup plain flour

Glazing :
1 egg beaten
Some white sesame

Method :
In a big bowl , add flour, salt, sugar and yeast. Use a spoon to simply mix them together.  Pour in the water and use a pair of chopstick or a rubber spatula to mix all wet and dry ingredients well. This whole process take about 5min.
The dough should be wet and loose.

Use cling wrap to cover the bowl. Allow the mixture to rise at room temperature until it is double in size( or at least flattens on top and dough has  many small holes),  take about two hours. Longer rising times will not hurt the dough.
Allow the dough proof for minimum 3hours. I proof it for 6hours. You may allow dough to proof overnight in the refrigerator and then shape it in the morning.


Shape the buns
After 6 hours proof in room temperature, shape the dough into desire shape.
Prepare a piece of baking parchment paper on a aluminum baking tray. Sprinkle  about 2 spoons of flour on a working surface. Pour out the dough from the bowl onto the floured surface using a rubber spatula. Using a pastry cutter divide dough into 6 portions. DO NOT KNEAD. Dust hands with flour and shape dough into oval shape with the help of the pastry cutter. Then place them on the tray lay with parchment paper.
Cover the shaped dough with a dry towel or clingwrap. Let the dough proof for another 1 - 1.5hours.


Preheat oven at 210°C and the rack placed in the middle.

After 1.5 hours proofing, eggwash the uncook bun with brush. Sprinkle some sesame on top of the dough.  Use a kitchen scissor to cut the top of the uncook bun. Put into preheated oven to bake to 20 minutes.

For this same recipe without the sugar, you may use it to make No Knead Artisan Bread and for pizza base

Tuesday, 20 October 2015

No Knead Artisan Bread


Recently saw a few post Artisan bread. Google and found a recipe from The Italian Dish that looks easy without kneading require and done within 5 minutes.  Decided to give it a try. It is really easy and no hassle and save time.
Needed only 4 ingredients and it taste very good. What we need is just a big plastic container with a lid to allow the dough proof inside the container. According to this blogger dough can be kept in refrigerator for 14days.
Today, mix the flour that is plain flour with bread flour. Original recipe called for 100% plain/all purpose flour.
I will try the next round using just plain flour. Today I believe because of the bread flour, the dough was very sticky and make shaping the dough become very difficult. After few attempts trying to shape the dough as I used to shape, the dough stuck on my fingers. In the end I can only shape it into something round  and placed it on the parchment paper. The surface was not smooth. But the result after further proofing and after baking it was satisfying.

Ingredients:
1.5 cups lukewarm water
2 tsp instant yeast
2 tsp sea salt
3 1/4 cups unsifted, all purpose flour( i used 60% bread flour & 40% plain)

Method :
Prepare a big plastic container with lid. Pour in the water. Add instant yeast and salt. Use a spoon stir a few strokes to get the yeast well mixed.


Add all of the flour at once, measuring the flour by scooping it and leveling it off with a knife. Mix with a spoon - do not knead.  Mix until everything is uniformly moist, without dry patches.  This step is done in a matter of a few minutes.  The dough should be wet and loose. Do not over mixed. Less stiring the dough the softer the bread will be

Put on the lid but not airtight. You want the gases to be able to escape a little. I used a lock and lock container but did not tighten. Just leave the lid on top to cover the opening. Allow the mixture to rise at room temperature until it begins to collapse (or at least flattens on top), about two hours. Longer rising times will not hurt your dough. This dough can be kept in fridge for 14days According to the blogger, the longer it leave to proof the easier to handle the dough. Recommended first time making this should allow the dough proof overnight in the refrigerator so that it will be easier to shape. However, i let it proof in room temperature for 3hours and then shape.

Shape your loaf.  Place a piece of baking parchment paper on a aluminum baking sheet.    Sprinkle the surface of your dough in the container with flour.  Pull up the dough. Gently stretch the surface of the dough around to the bottom on all four sides, rotating the ball as you go.  Dust your hands with flour if you need to.  This is just to prevent sticking - you don't want to incorporate the flour into the dough.  The top of the dough should be smooth - the object here is to create a "gluten cloak" or "surface tension".  It doesn't matter what the bottom looks like, but you need to have a smooth, tight top.  This whole step should take about 30 seconds!  Place the dough onto your parchment paper.

Let the loaf rise for about 30 - 40 minutes (it does not need to be covered).  If it doesn't look like it has risen much, don't worry - it will in the oven.  This is called "oven spring".

Preheat a baking tray on the middle rack in the oven for at least 20 minutes at 225°C. If you have a cast iron pot, use a cast iron pot. However, as i do not have it, so this is the part that I have modified.

Dust the loaf with a little flour and slash the top with a knife.  This slashing is necessary to release some of the trapped gas, which can deform your bread.  It also makes the top of your bread look pretty - you can slash the bread in a tic tac toe pattern, a cross, or just parallel slashes.  You need a very sharp knife or a razor blade - you don't want the blade to drag across the dough and pull it.  As the bread bakes, this area opens and is known as "the bloom". Remember to score(make a cut/slash the surface)the loaves right before baking.

Bring out the preheat baking tray and place the dough including the parchment paper onto the preheat tray. And return the tray into the oven and bake for 30-35minutes depend on the size of your dough. The blogger place a cup of water in the oven during the baking process to get a crispy crust. I omitted this process.

You may also want to try using no knead dough for buns. See my post No Knead Sandwich Buns